Showing posts with label quilt. Show all posts

Friday, August 18, 2017

My Improv Stripes Mini Quilt


Oh, how I love improv! It takes me out of my box, out of the constraints of being "perfect", and straight into a place where my creativity can dip its toes into new waters. 

At the end of July, Debbie at A Quilter's Table hosted a QAL using another of her great ideas.

You may remember my Cross Cut Quilt from last summer.
I had followed Debbie's QAL then and that quilt is one of my all-time favorites that I've made.

My Cross Cut Quilt 2016

Debbie's latest improv project was the Improv Stripes technique. 
The idea was to use fabrics with contrast, cut them into strips, sew them together and make stripes!
Blocks of various sizes would be made, then later trimmed to be sewn together. 

I decided to pull out my stash of Halloween fabrics.
Not having a particular size or shape in mind, I just dug in!

Above are some of my untrimmed blocks of stripes.

It started growing!


Fitting the blocks together was the hardest part...but still fun!
Strips and stripes were added, blocks were cut in 2 or 3 pieces and then reattached just to fit. 

I quilted using a spiral design.
I liked the idea of the curves against all of the sharp edges and corners of the stripes and blocks. 


I backed this piece with gold polka dots on black fabric. 


Finished size is 28" x 30". A nice size for a table topper.
It will look so cool with my collection of Halloween props of witches, pumpkins and ghosts.

I think I have a new favorite!

Linking up with:


Wednesday, March 29, 2017

Pieced HSTs for Postcard From Sweden quilt


One of my goals for 2017 is to  make the Postcard From Sweden quilt. It's a quilt I've long admired since I first saw it on Pinterest. When Myra from Busy Hands Quilts posted about a quilt along late last year, I knew I had to hop aboard!

Life was a bit busy at the beginning of March when she started the quilt along, so I was behind for the first link-up. That meant double-duty for me to catch up!


I had plenty of solids to choose from in my stash.
Most are Bella and Kona solids with a few orphans thrown in.


I narrowed it down to what I  needed.


Always, always wishing I had a few more purples. Sigh.


Here are my HSTs after cutting.


Each color pile was assigned a number and was set in formation like pointy little soldiers
awaiting their call of duty. Soon, they'd get assigned their partners!


All stitched into blocks and labeled according to rows.


These are my leftover triangles. I know they'll make a pretty project...someday.


edited to add: I was late to the link-up! Shoot!


Wednesday, September 21, 2016

My Crosscut Quilt

I was a bit late in joining the party to the Crosscut Quilt-Along I found on Instagram this past summer. Yep, summer 2016 has already PASSED! How did that happen??? The moment I saw some of the photos, I knew I had to join in. I love modern, improv quilting and this was just my groove.

Debbie at A Quilter's Table is the designer of this technique and she has one heck of a creative mind! I could make a thousand of these and no two would look alike.
You can follow her tutorial here: Crosscut Block Tutorial.

Here's my Crosscut journey:


 I chose my fabrics from my stash according to the décor of "someone special".
This will be a Christmas gift, so no names will be shared here!


These are my first 9 blocks. Already looks cool, doesn't it?


I needed many more blocks to make a quilt big enough to wrap up in while on the couch,
so more were added.


This is a crappy photo, but I laid it on top of a black fuzzy throw we use often in our house.
I needed to compare sizes. More blocks needed!


Just a pretty pic of the triangles and strips.
Not many things really look good against my purple cutting mat.


Here is the full top BEFORE it was cut apart!!
This is the step that I didn't think I could do....I had to cut it up!
But I did.
And I was happy.


The first few cuts.


The freshly cut blocks scattered on the floor as I tried to find the best arrangement.


Proof that Miss Sophie was here!
The stinker.


Here is the new Crosscut quilt top all sewn back together.


A close up before quilting.


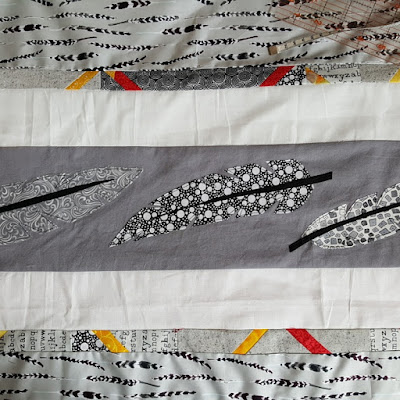
These are photos of the back. I used some leftover fabrics to cut feathers using a template I found online. Then I used Lara Buccella's technique from her book Crafted Applique to adhere them. I have wanted to try Lara's technique since her book came out earlier this year, so this was the perfect time! It turned out wonderfully and added a lot to make a very unique backing for this quilt.

I machine quilted this 50" x 60" Crosscut quilt using a wavy stitch starting on one corner and going to the adjacent corner making curves. Of course, the curves got bigger and bigger the farther I went.
I really like the effect overall.

The finished product:


I am entering this quilt into two challenges: