Wednesday, May 1, 2024

April Showers!


I know, I know...it's already May, but it's still raining in my corner of the world!

Besides, I wanted a mini quilt for my wall to celebrate Spring.

I was inspired to make this as I looked on Pinterest for a quilted piece that included an umbrella. 

Why an umbrella? So I could link up to Joy's Table Scrap Challenge at The Joyful Quilter!


I started with this background fabric that I bought at a 2nd hand shop in Missouri on our way to see the last solar eclipse. The tag is hard to read, but I snagged this 2 yard piece of Art Gallery newspaper print for $1.99!! Someone surely didn't know it's worth!

I printed off an umbrella template and found this perfect scrap of bird fabric that was exactly the right size. Sometimes things just work out, don't they?


A few steps later, I had my tulips, stems, leaves and grass cut out and prepped with Heat n Bond Light. 


Getting everything placed and stitched down is the fun part! 


A striped binding and she's done!

April showers really do bring May flowers!
The daffodils are already faded and the tulips are in full bloom!

May your gardens bring you joy this season!

Linking up with:


Saturday, March 23, 2024

Project Quilting 15.6: Irish Chain


This is the final challenge of Project Quilting's 15th season. It makes me a bit sad! 

This week's theme is Irish Chain. While the Irish Chain design is quite simple and makes a great impact when made into a large quilt, I was thinking to make one on a smaller scale. I didn't like the idea of a simple block being flagged by a 9 patch on either side. 

So, I followed the Number One rule this week:  Your project must be inspired by the traditional Irish Chain quilt design.


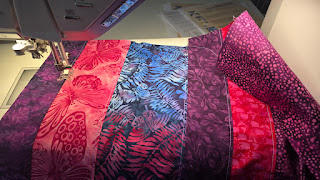
I pulled out a bag of batik scraps and a few FQs that I won from Preeti at Sew Preeti Quilts earlier this year. She was so very generous in sending more than I expected...especially these gorgeous purples!


Having no idea where this was going, I started with making eight 9-patch blocks...this block is almost always present in the Irish Chain. 

Next I did what Preeti would likely do: Ask her husband, Paul, what she should do next.
Fortunately for me, I have a husband name Paul, too, and he is pretty good at giving advice!

I showed Paul several examples of the Irish Chain design I found on Pinterest to pre-load his brain. 

Me: Now that you know what an Irish Chain project looks like, what can I do to these 8 blocks to accentuate a chain look?

Paul: What if you cut small whitish squares and added them on top in the arrangement of a chain?


Me: Ok, so what do you think of this idea? I'm not feeling it.

Paul: Nope, me neither. What about a ribbon running cross-wise to get the chain effect?


Me: Hey, I think this idea is getting closer!

Paul: Great! Can I get back to taxes now?

Me: Yep!


Instead of ribbon, I cut 1" wide strips of coordinating purple batik fabric and sewed it on top of the squares to make the Irish Chain effect. I decided not to top-stitch the strips because I liked the floating look.


Next came the quilting which is just straight stitching to mimic the purple strips.
This purple swirl backing carries a lot of history! It covered many bulletin boards in my days of teaching. It has war-wounds of staple holes and some fading, but it's perfect for backing small projects. 

Hand stitching the binding to the back while watching the evening news seems to take the edge off the catastrophes of the day. Notice sweet Sophie in the background snoozing away!


I am just tickled with how this project turned out! 

My Irish Chain-ish table runner measures approximately 13" x 25".


Thank you, Kim and Trish, for another wonderful season of creating things I would never have thought of on my own!  And, thank you to Preeti, for supplying the beautiful batik fabrics for this project!

Linking up with:


Monday, March 4, 2024

Project Quilting 15.5 Wearables


I wish I'd had a photo of my face when I read this week's PQ challenge! Wearables??? Really?

I've made a whole lot of wearables in my sewing room, including my first pair of jeans as a teenager. Lots of maternity clothes, baby and toddler outfits and even a clown suit for a professional clown! 

So the idea really didn't scare me, but the thought that I had to get this project done in 2 days threw me into a panic. We are leaving for a vacation to a lovely, warm tropical island Tuesday morning. 

As long as the project could be explained as something that can be worn, or was once a wearable piece, or includes an idea of something that can be worn, it's good to go! 

My panic lasted a few hours. Then I knew. I have always wanted to make a lanyard to help me keep track of my mini scissors. 


Everything I needed was already here at home.

I followed the Pretty DIY Lanyard Tutorial at SewCanShe. Caroline Critchfield writes up the best tutorials for so many projects and most are free! Check out her site if you haven't already spent hours there already...like I have. 


Fusible interfacing to give a bit of body and stiffness. 


I added a selvage message "Be Open To Whatever Comes Next". 
I'd been hanging onto this selvage scrap forever, 
and figured this was fitting! 


I had my lanyard "wearable" and completely finished in about an hour!
Whew! Good thing I've already got my suitcase packed. 


I realize this looks like I'm wearing an Olympic medal. 
I sorta feel like I won a medal for getting this accomplished so quickly!

I love it and know it will be worn always when I'm in front of my sewing machine. 
No more lost scissors! 


Linking up with:


Saturday, February 24, 2024

Project Quilting 15.4: Hour Glass


This week's Project Quilting challenge was Hourglass.  Hosted by Kim Lapacek and her friend Trish, this is an annual challenge that I look forward to! 

 I used the Hourglass block in the top and bottom of my mini wall hanging. 

I was so hoping I'd be able to incorporate the theme into a project to decorate my home for St. Patrick's Day. 

I used last post's technique from Inside Out to make the Shamrock.
It's really a look that I love with the ruffly seams!

 
I used a wavy stitch in gold thread to quilt the strips before adding to the background. 

This was my first attempt at making an Hourglass block. 
Whoops! My memory ain't what it used to be, so I needed to consult a tutorial. 
Leslie, at the Seasoned Homemaker came to the rescue giving me the perfect instructions


After sewing my Hourglass blocks together for the top and bottom, I got started with quilting the middle section. 

I quilted this in an hourglass block design with just straight line stitching inside of each square. 


The paper template was pinned down (with the green ruffly stripped piece laying underneath) and I sewed around it twice, keeping close to the edge of the paper. 
The magic happens when I cut inside the lines and remove the top shamrock!


Green glass beads were sewn around the shamrock's edge.


Round gold beads were added near the top and bottom Hourglass borders. 


Before hand-stitching the binding down to the back, I added corner triangles and hanging strips so I'd have options when hanging it.


Now I'm set for St. Patrick's Day! 
My finished mini wall-hanging measures approximately 17" x 14".
Quilted with 3 layers and made in my Asbury, Iowa sewing room!

Linking up with:


Saturday, February 10, 2024

Project Quilting 15.3: Inside Out


This week's Project Quilting prompt "Inside Out" had me stumped! (You can find out more about this fabulous annual challenge here  It is hosted by Kim and Trish and their ideas are crazy good!

I found no inspiration on Pinterest and no ideas were trickling into my head ...until bedtime Monday night. Just as I was drifting off to sleep, an idea came in! I didn't get much sleep Monday night because I was constructing this in my head.


I started with some leftover jelly roll strips and a small piece of white-on-white fabric. I cut the strips down to 1" wide each. 


2 by 2 the strips were sewn together with wrong sides together. Wow! This was harder than I realized. I really had to focus to NOT put them right sides together. Once they were sewn, I used my pinking shears to give each seam a ruffled look. 

The seams were pressed open and I continued to sew the strips together to make one larger piece. Each seam was "pinked".


This larger piece was then quilted with batting simply with one line down between the seams. 


I added 2 strips of borders to the top and bottom of the white fabric and quilted this in diagonal lines. Using my chalk pen really helps get those lines straight!


With the ruffly stripped piece pinned to the back and a heart shape template pinned on the front, I sewed the heart outline twice without sewing directly on the heart. I didn't want to trace the shape and leave any marks, so this worked well. 


And this is where the magic happens! With my fancy scissors, I cut just inside the 2 lines of stitching on the top to reveal the ruffly heart below! It is when the Inside comes Out!

I do think I caught myself giggling at this point!


French Knots were added. 

At this point in the photo, I had spent 15 minutes making French Knots.

3 trips around the heart making French Knots = 2.5 hours. 


I also added pearl beads along the top and bottom. 


Here she is and all finished! 

The finished size is 16" x 12". 

Thanks to the Project Quilting ladies for this challenge and helping me to create something I love and will enjoy for many years! 


Linking up with:

Project Quilting

Beauty Pageant

Wednesday Wait Loss @ Inquiring Quilter

Table Scraps Challenge